Tutorials
Run Application
Introduction
This section guides you through using KOS Studio to create and configure a runnable KOS image for your Java application. You’ll open KOS Studio, create a new image, configure it with the necessary settings, add your KAB file, and assign it to the appropriate section. You’ll run the configured image in the KOS Studio simulator to test its functionality. Finally, you’ll debug your applications to step through the code you’ve written. Following these steps is essential to running your application on your developer machine.
|
Why can’t I run a KOS app like any other Java application?
A KOS application, packaged into an image, is a complete set of code and dependencies that executes only on the KOS runtime system. KOS Studio includes a simulator to test applications in a KOS environment before deploying them to actual hardware. Learn more about KOS Studio |
Step One: Create the image in Studio
Now that our Java application is written and bundled into a KAB file, let’s turn our attention to KOS Studio.
|
KOS Image
In a nutshell, an image, or disk image, is the blueprint for what a KOS node will run when it boots. It’s defined by a manifest, which outlines the filesystem’s contents and how user space functions. For nodes running Java, this manifest also specifies all the Java code to execute. Think of the image as an editable version of this manifest—your ticket to creating a bootable and reusable environment for multiple devices without the hassle of repeated inheritance setups. |
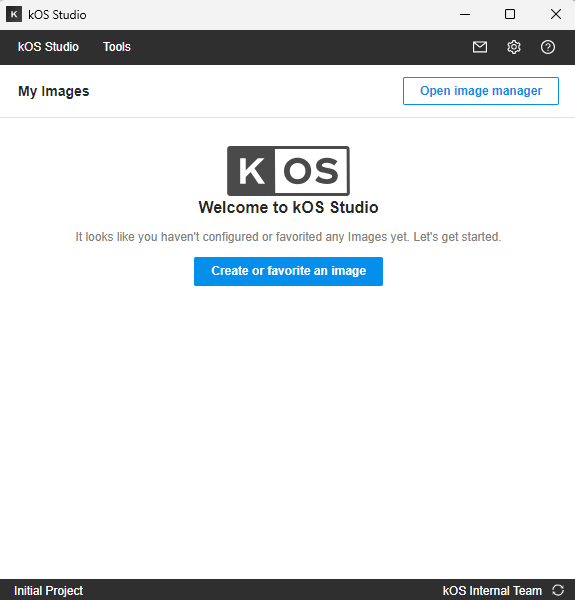
Follow these steps to create an image: 1. Open the KOS Studio application. 2. In the top-level menu bar, click on the "open image manager" button.
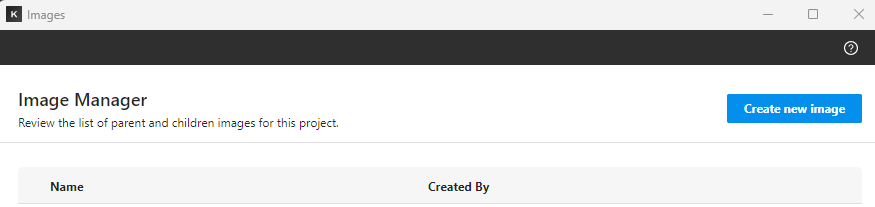
In this Images window, click on the "create new image" button.
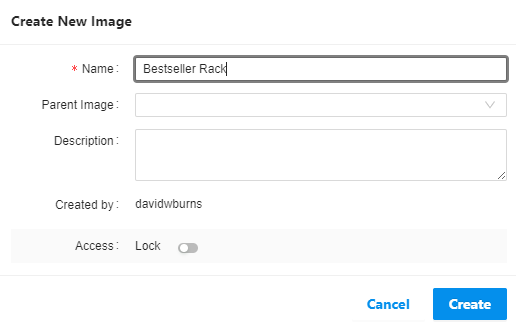
In the popup dialog, enter a "Name" for this image, leave the "Parent Image" field blank, then click "Create":
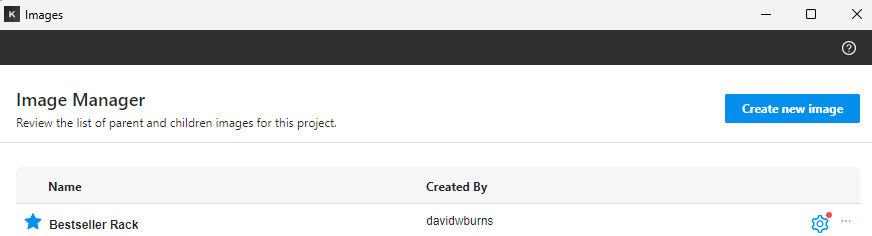
Now the Images window shows an entry for the image you just created:
Close the Images window and return to the main Studio window.
Step Two: Configure the image
On the main Studio screen, click the gear icon associated with the image you just created, which opens up the configuration dialog. This configuration window is perhaps the most important part of KOS Studio. It gives you and your team the ability to create any number of runnable images, each with a wide variety of options. Much time will be devoted to using it.
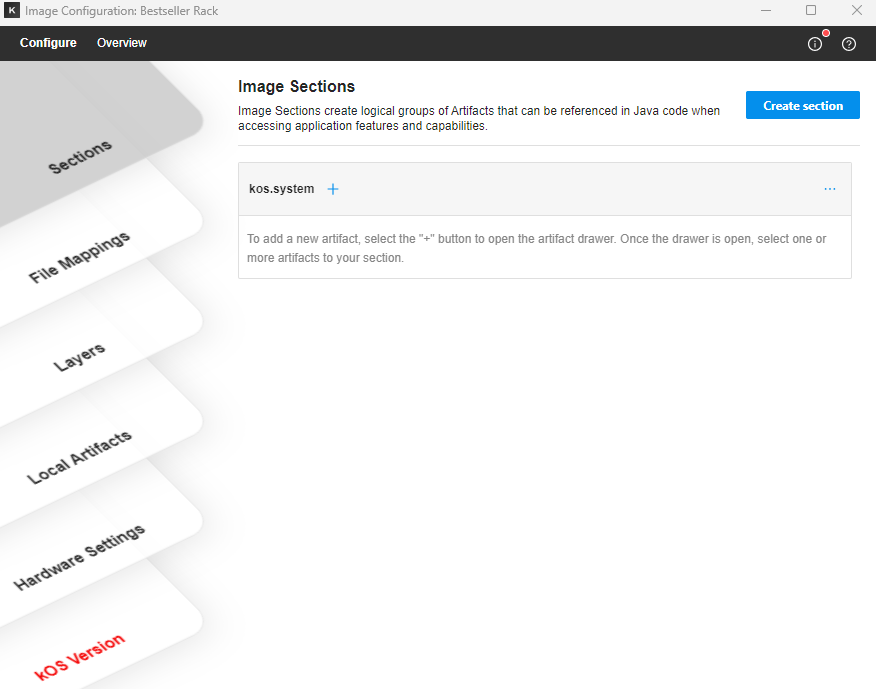
As you can see, there is a stack of six configuration items, also known as "cards":
-
Sections: A section in KOS is an artifact container where you group your KABs and give them meaning by their names. More about Sections.
-
File Mappings: Defines mappings into the simulator file system.
-
Layers: A layer is a specific type of KAB file that allows you to customize OS-level changes for your image. You can choose from Market, Published, or local layers to add to your image.
-
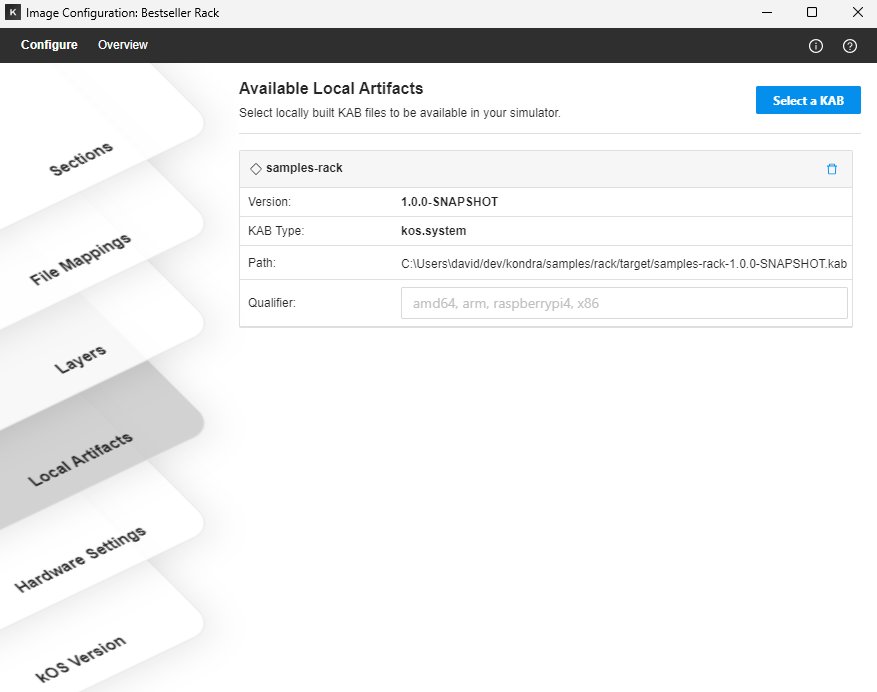
Local Artifacts: The Local Artifacts card in the image configuration window lets users select a locally available KAB for use in the image. This is useful for testing changes or using artifacts that are not yet published.
-
Hardware Settings: The Hardware Settings card allows users to configure their simulation and node settings, including selecting hardware profiles, configuring port mappings, and setting developer flags.
-
KOS Version: The KOS Version card is the first step in setting up your image. Here, you can specify which KOS version and add-ons you want to use.
The "KOS Version" item has red text, meaning that it needs attention.
Configure the KOS Version
Our next step is to tell Studio which release of KOS we want to use, which will satisfy the current alert.
-
Click on the "KOS Version" card.
-
Click on the "Configure new release" button.
-
On the left-hand side, navigate and then select the desired KOS release.
-
Give this selection a name and an optional note.
-
Check Graphics.
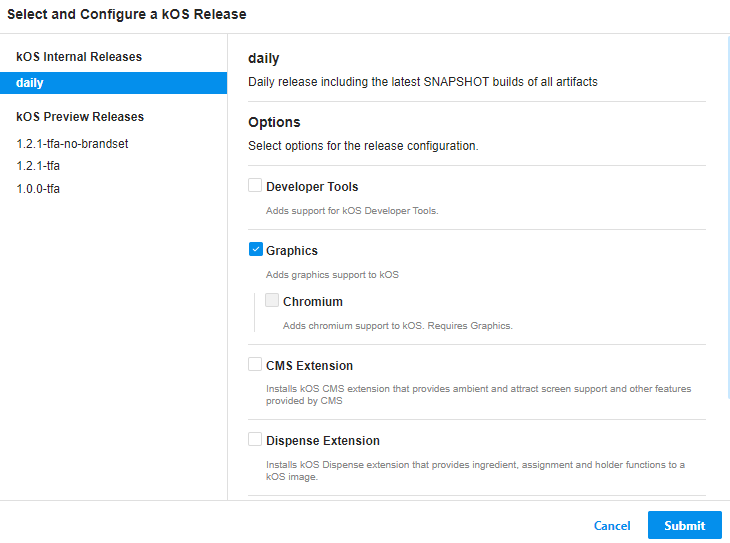
-
Click the "Submit" button.
-
Then select the newly-created release.
At this point, the "KOS Version" section is no longer red, meaning it is configured properly.
Configure the local artifact
-
Click on the "Local Artifacts" card.
-
Click the "Select local artifact" button.
-
Navigate to and select the KAB file created earlier by our Java code.
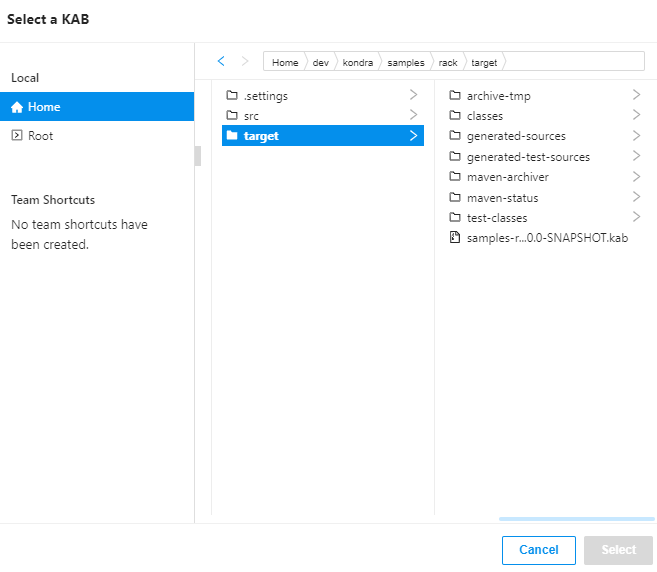
-
Click the Select button, where you should see:
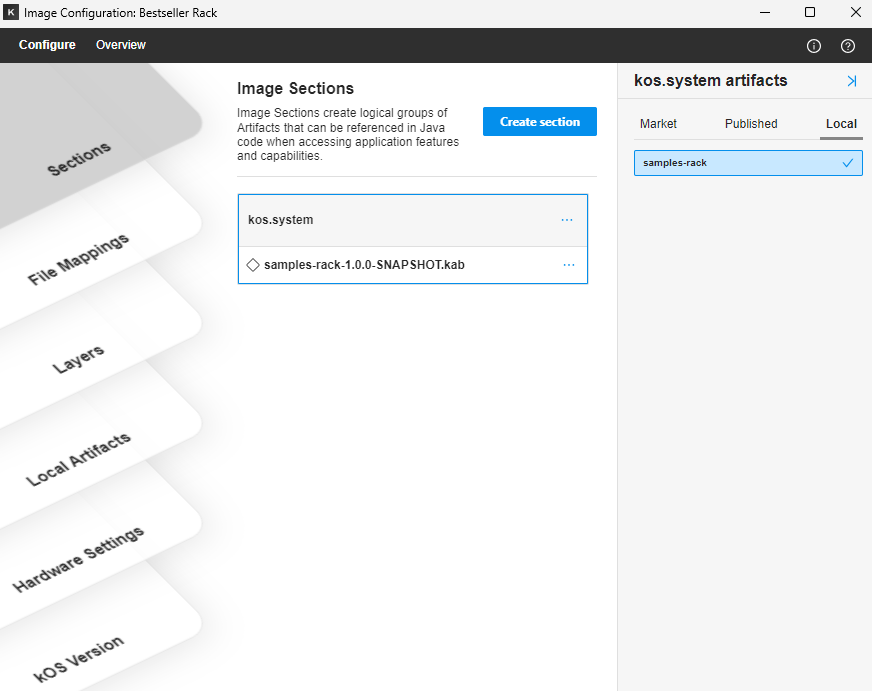
Add local artifact to section
A section in KOS is the artifact container. It is where you group your KABs and give them meaning by their names.
-
Open the "Sections" card.
-
Drag the "samples-rack-1.0.0-SNAPSHOT.kab" item from "Local Artifacts" to the kos.system "Section".
-
Close the configuration window.
Step Three: Execute the image
To run your KOS application in Studio’s built-in simulator:
-
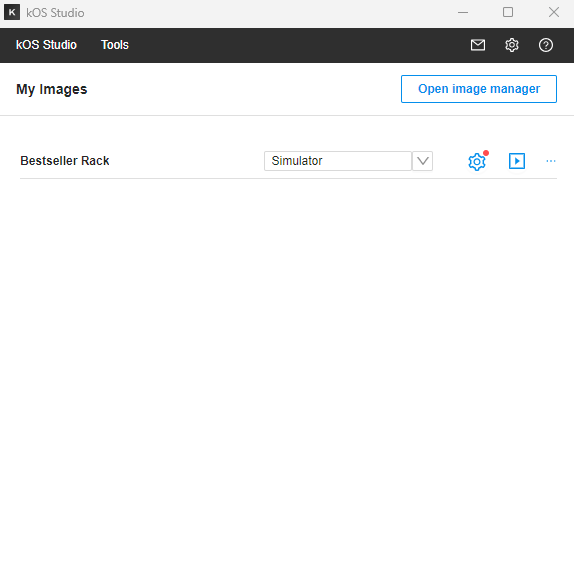
On the main Studio screen, find your "Bestseller Rack" image entry.
-
Ensure that "Simulator" is selected.
-
Click the "run now" (play) icon.

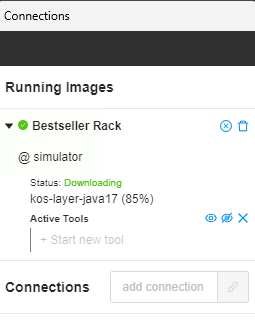
Figure 12. Executing the image.
The application first downloads all necessary artifacts, showing the status in the Connections window. The first time you run an application it may take a while to download the required packages. Subsequent executions open much faster.
When downloading is finished, the application will begin to load. You’ll see the simulator starting up:

Figure 14. Simulator When the simulator has finished, you should see your bestsellers rack application:

Figure 15. App running.
|
Debugging
Since your application is packaged as a KAB file, in order to debug any changes to your code, the KAB must be rebuilt and deployed to your target device. KOS studio provides an application that mimics the jvm which can run your build script to rebuild your KAB and then automatically deploy the KAB to your target. When properly configured in your IDE, you simply click the debug button and KOS Studio will build your code, package your KAB, deploy to your target and start the debug session, providing you a seamless debug experience whether working with the desktop simulator or real hardware. The following articles will help you better understand the debugging method and guide you through setting it up in IntelliJ and Eclipse IDEs: |
Try dropping a break point in your app and give it a whirl!
Congratulations, your first KOS application is up and running! To make changes to your app, simply stop the simulator, update your code, rebuild the KAB file, and restart the simulator. It’s that easy!
Summary
This lesson has equipped you with the skills to effectively use KOS Studio to create, configure, and test a runnable KOS image for your Java application. By following these steps—opening KOS Studio, creating a new image, configuring it with necessary settings, adding your KAB file, assigning it to the appropriate section, running it in the KOS Studio simulator, and debugging your code—you’ve laid the groundwork for successfully running your application on your developer machine. Great job!
On this page
Java Development
Seamlessly transition from Legacy+ systems to Freestyle microdosing and advanced distributed dispense systems.
UI Development
Using KOS SDKs, integrating Consumer and Non-consumer facing UIs becomes seamless, giving you less hassle and more time to create.
Video Library
Meet some of our development team, as they lead you through the tools, features, and tips and tricks of various KOS tools.
Resources
Familiarize yourself with KOS terminology, our reference materials, and explore additional resources that complement your KOS journey.
Copyright © 2024 TCCC. All rights reserved.