Documentation
Hardware Management
When you are developing a smart dispensing application, the hardware a single-board computer where your application runs is a crucial part of the development. Unlike web applications, each board has its own limitations on available memory, disk size, etc.
KOS Studio enables you to simulate the hardware as a virtual machine with limited disk, memory, and screen resolution. This is a powerful tool as it removes the need for real hardware for development.
As an organization, hardware profiles per project are managed from the Hardware Profiles Management screen.
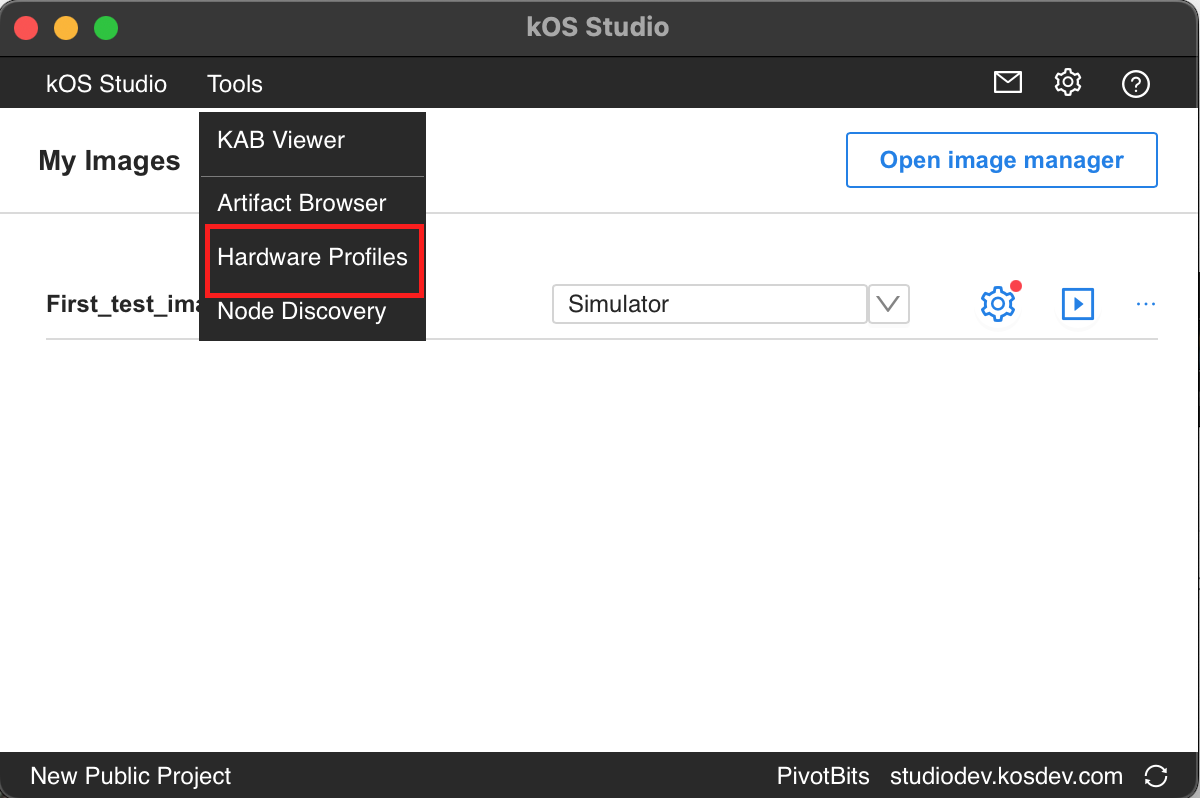
Navigate to hardware profiles management
-
Login to KOS Studio.
-
Select Tools from the top navigation bar.
-
From the tools dropdown select Hardware Profiles.
-
Hardware Profiles open in a separate window. From here, you see the list of available hardware profiles and create a new hardware profile option is available to register new hardware profiles, which then can be used with an individual image.
Figure 1. Access hardware management
View hardware profiles
-
Login to KOS Studio.
-
Select Tools from the top navigation bar.
-
From the tools dropdown select Hardware Profiles.
-
Hardware Profiles open in a separate window. The list of available hardware profiles is displayed on the left-hand side and hardware profile details are displayed for the selected item. Consider following :
-
If no hardware profiles are available, the application shows a message for the user to add one.
-
A default profile is available on Image Configuration Screens Image Configuration Screens if no hardware profiles are defined.
-
Create a new profile
-
Login to KOS Studio.
-
Select Tools from the top navigation bar.
-
From the tools dropdown select Hardware Profiles.
-
On the Hardware Profiles window, click on the Create new profile button.
-
This will open create a new profile modal to input details about the hardware profile. Consider following :
-
Name : Name for the profile.
-
Description : Description for the profile.
-
Node Name : Name for the node. Node name should always start with a letter and can include letters, numbers and underscore.
-
Node Type: Type for the node. Node type should always start with a letter and can include letters, numbers and underscore.
-
Primary Node : Indicate if node is a primary node. In case of single node device, primary node should be set to true
-
Disk Size: Disk size for the board.
-
Memory Size: Memory size for the board.
-
Screen Resolution: Screen resolution if board is connected to the screen.
-
Access : Indicate if access to this hardware profile should be restricted via a lock
-
-
Edit a profile
-
Login to KOS Studio.
-
Select Tools from the top navigation bar.
-
From the tools dropdown select Hardware Profiles.
-
On the Hardware Profiles window, select the profile to edit from the list on left-hand side.
-
Profile details are now displayed for the profile you wish to edit. Click on edit icon
 to edit profile.
 -
This opens up Edit Profile modal window, where you can edit the information for the profile.
-
Click on Update to update changes to the profile. Consider following :
-
To restrict the modification of a profile, you can mark profile as locked. Once profile is marked as locked, no changes can be made to the profile
-
To restrict the visibility of a profile, you can mark profile as hidden.
-
On this page
Java Development
Seamlessly transition from Legacy+ systems to Freestyle microdosing and advanced distributed dispense systems.
UI Development
Using KOS SDKs, integrating Consumer and Non-consumer facing UIs becomes seamless, giving you less hassle and more time to create.
Video Library
Meet some of our development team, as they lead you through the tools, features, and tips and tricks of various KOS tools.
Resources
Familiarize yourself with KOS terminology, our reference materials, and explore additional resources that complement your KOS journey.
Copyright © 2024 TCCC. All rights reserved.