Install kOS Bootloader
Board: RPi-CM4/Rpi-Flex
Prerequisites
-
Before flashing an RPI CM4 module with KOS Bootloader, ensure your Mac or Windows machine has the necessary software installed
-
For macOS, please refer to Prerequisites for macOS
-
For Windows, please refer to Prerequisites for Windows
-
-
You will also need the following hardware.
-
A Windows or Mac machine with a USB Standard-A port (or the with supported USB hub or adapter)
-
A Raspberry Pi Compute Module 4 single-board computer connected to a CM4 IO board
-
An HDMI monitor, keyboard, and ethernet cable that you’ll connect to the RPi board
-
One USB cable, Type-A male to Micro-B male (Amazon)
-
One jumper cap (Amazon)
-
Step 1: USB boot RPi CM4
-
With the power cord connected to the RPi IO board, discharge any static electricity buildup from your body by touching a grounding point, such as the metal body surrounding the ethernet socket on the RPi board.
Figure 1. -
Remove power from the RPi board.
-
Install a jumper on the J2 connector across the pins labeled "Fit jumper to disable eMMC Boot".
 Figure 2.
 -
Plug a USB cable directly (don’t use a hub) from your computer into the "USB Slave" micro-USB port on the IO Board.
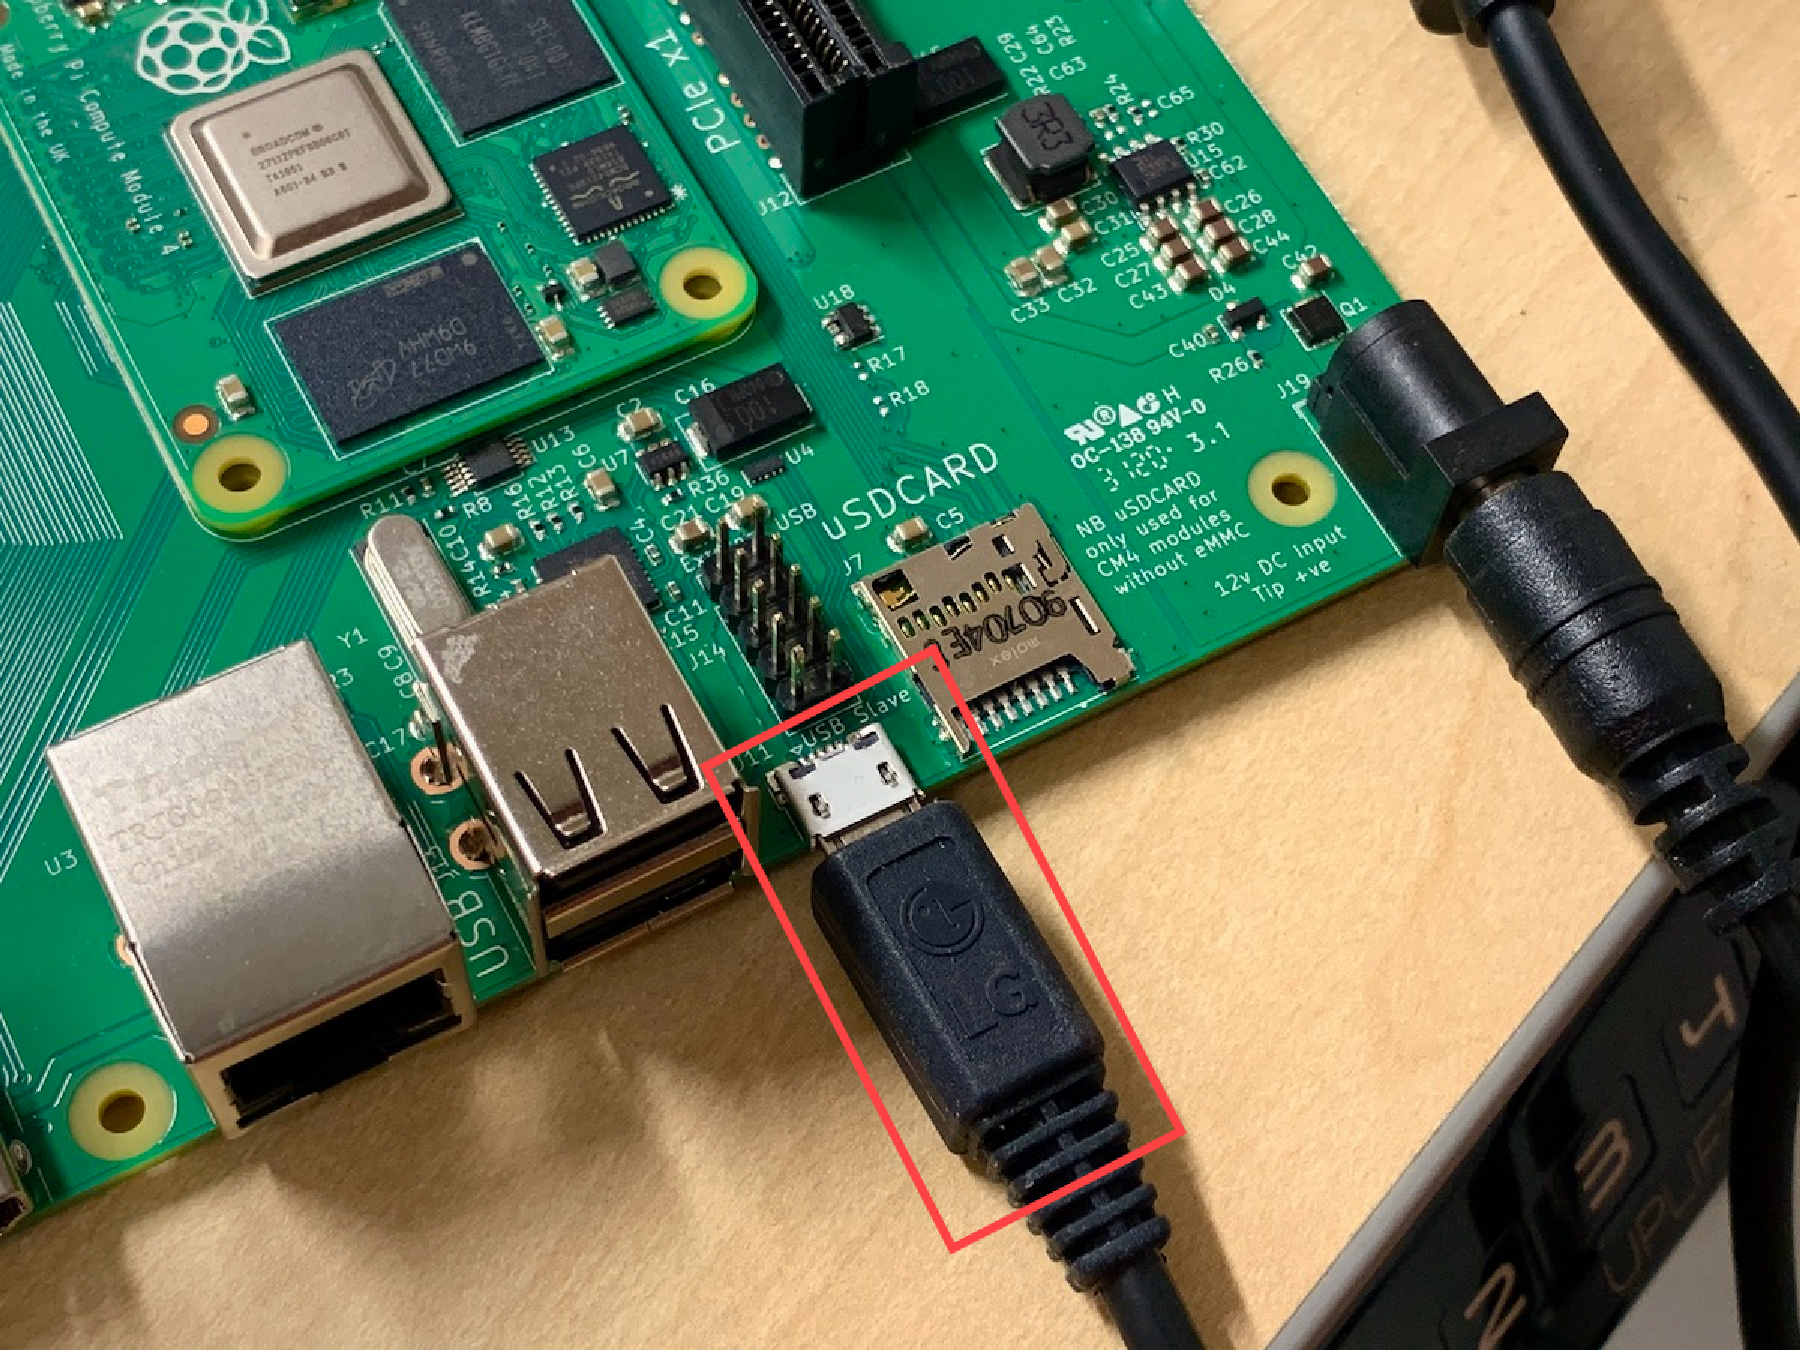 Figure 3.
 -
Plug the power back into the RPi board. The red "D1" LED turns on when it powers on, but the module won’t boot.
 Figure 4.
 -
Run rpiboot from usbboot to mount RPi as a USB drive on your machine.
|
App Notes
The rpiboot is installed or compiled based on the machine type you are using and explained in the setting up the machine section which is mentioned in the prerequisite. |
cd usbboot
sudo ./rpiboot
When this exits, you should have a boot drive on your laptop or MacBook:

Figure 5.
Step 2: Download the bootloader for RPI-CM 4 or RPi-Flex
-
Navigate to KOSDev Download Page here.Download the RPI CM 4 bootloader Or RPI Flex bootloader file based on your requirements.
-
If you use Safari to download the file, the file is automatically unarchived, and the *.img file will be in the download location.
-
On other browsers, you will use the *.img.gz file for flashing.
-
Step 3: Install bootloader on board
-
Start the Disk imaging software (Balena Etcher or RPi Imager) installed in the machine.
-
Locate and select the '.img' or '.img.gz' file. Then select the drive representing the RPi in boot mode.
-
Follow instructions Balena Etcher or RPi Imager to flash the image to the flash drive.
Step 4: Verify installation
For RPI CM4
-
Turn off the power to the board
-
Remove the J2 Jumper from the IO board.
-
Remove the micro USB cable connected to the IO board.
-
Connect the USB keyboard and HDMI monitor.
-
Connect the Ethernet cable to the board.
-
Power up the board and wait for a few seconds to boot up.
-
The screen should show “Node Manager,” and the IP should be displayed.
For RPi-Flex
-
Turn off the power to the board
-
Remove the RPI from the CM4 IO board and plug it into the Flex board setup.
-
Power up the flex board.
-
Power up the board and wait for a few seconds to boot up.
-
The screen should show “Node Manager,” and the IP should be displayed.
On this page
Java Development
Seamlessly transition from Legacy+ systems to Freestyle microdosing and advanced distributed dispense systems.
UI Development
Using KOS SDKs, integrating Consumer and Non-consumer facing UIs becomes seamless, giving you less hassle and more time to create.
Video Library
Meet some of our development team, as they lead you through the tools, features, and tips and tricks of various KOS tools.
Resources
Familiarize yourself with KOS terminology, our reference materials, and explore additional resources that complement your KOS journey.
Copyright © 2024 TCCC. All rights reserved.