Documentation
Sections
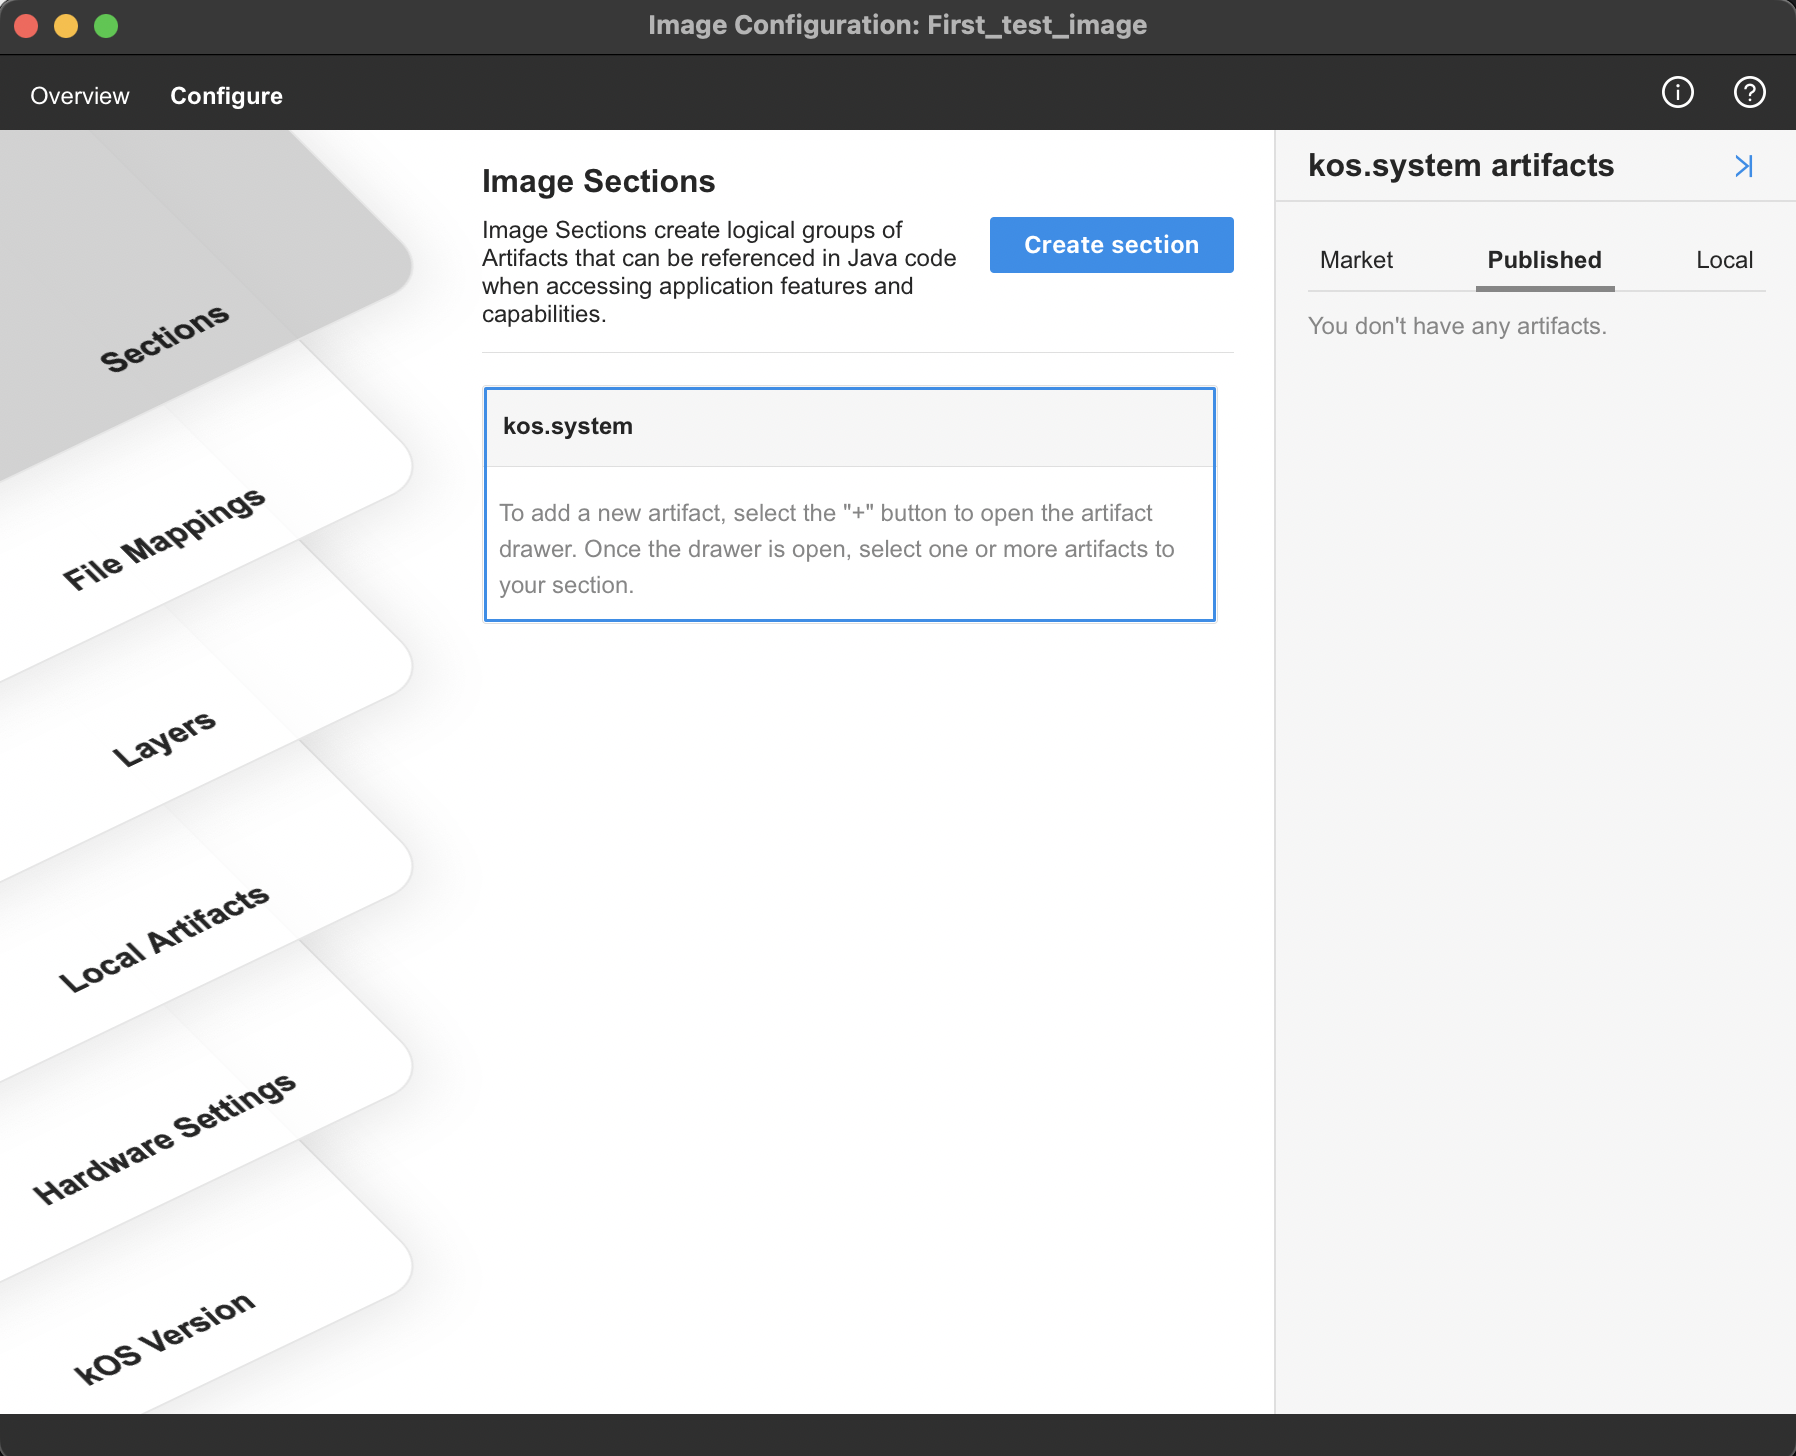
A section in KOS is the artifact container. It is where you group your KABs and give them meaning by their names. Learn more about sections here.
Figure 1. Configure sections
Access and view sections for an image
-
Log in to KOS Studio, and from My Images, click on Open Image Manager (in the upper right corner of the screen)
-
From the list of images, select the image you want to update and click on Settings
 for that image(on right hand side for image row)
 -
Select the configure tab from the top menu on the image configuration window.
-
From the Image Configuration window that opens, select Sections . Here, you can view configured Sections for your image. Consider following :
-
The inherited label
 indicates an inherited artifact in a section for the child image.
-
Create a section
-
Log in to KOS Studio, and from My Images, click on Open Image Manager (in the upper right corner of the screen)
-
From the list of images, select the image you want to update and click on Settings
for that image(on right hand side for image row) -
Select the Configure tab from the top menu on the image configuration window.
-
From the Image Configuration window that opens, select Sections.
-
On Sections screen, click on Create Section button on top right.
-
Enter the name of the section on the create section pop-up. Click on Create to create section with provided name. Consider following :
-
Creating a section is disabled for a locked image.
-
Disable a section
-
Log in to KOS Studio, and from My Images, click on Open Image Manager (in the upper right corner of the screen)
-
From the list of images, select the image you want to update and click on Settings
for that image(on right hand side for image row) -
Select the Configure tab from the top menu on the image configuration window.
-
From the Image Configuration window that opens, select Sections.
-
On Section screen select the section to disable. Click on the more
 and select Disable to disable a section.
Consider following :
and select Disable to disable a section.
Consider following :-
Disable a section option is disabled for a locked image.
-
Enable a section
-
Log in to KOS Studio, and from My Images, click on Open Image Manager (in the upper right corner of the screen)
-
From the list of images, select the image you want to update and click on Settings
for that image(on right hand side for image row) -
Select the Configure tab from the top menu on the image configuration window.
-
From the Image Configuration window that opens, select Sections.
-
On Section screen select the disabled section to enable. Click on the more
and select enable to enable a section.
Consider following :-
Enable a section option is disabled for a locked image.
-
Delete a section
-
Log in to KOS Studio, and from My Images, click on Open Image Manager (in the upper right corner of the screen)
-
From the list of images, select the image you want to update and click on Settings
for that image(on right hand side for image row) -
Select the Configure tab from the top menu on the image configuration window.
-
From the Image Configuration window that opens, select Sections.
-
On Section screen, select the section to delete. Click on the more
and select delete to delete a section.
Consider following :-
Delete section option is disabled for a locked image.
-
Delete section is not available for a kos.system section as it is a section where start an application is specified
-
Delete section is disabled for an inherited section for a child image.
-
Add artifact to a section
-
Log in to KOS Studio, and from My Images, click on Open Image Manager (in the upper right corner of the screen)
-
From the list of images, select the image you want to update and click on Settings
for that image(on right hand side for image row) -
Select the Configure tab from the top menu on the image configuration window.
-
From the Image Configuration window that opens, select Sections.
-
On Section screen, select the section to add an artifact. Click on the add next to section name

-
On the artifact selection drawer, you can choose from Market, Published and Local artifacts.
-
Choose the artifact from available categories :
-
Market: Click on the market tab, select the artifact from the Market, Click on the artifact entry to see all the available versions of that artifact, and click on the relevant version to select.
-
Published: Click on the Published tab, select the artifact, and Click on the artifact entry to see all the available versions of that artifact. Click on the relevant version to choose.
-
Local: Click on the Local tab. The artifact added through the Local Artifacts section will be displayed here. Select an artifact to be added to the image.
-
-
Once the artifact is selected all the relevant information about the artifact will be displayed on the sections screen.
Set Selector for an artifact in a section
-
Log in to KOS Studio, and from My Images, click on Open Image Manager (in the upper right corner of the screen)
-
From the list of images, select the image you want to update and click on Settings
for that image(on right hand side for image row) -
Select the Configure tab from the top menu on the image configuration window.
-
From the Image Configuration window that opens, select Sections.
-
On Section screen, select the artifact in a section to set the selector. Click on more
-
From the more options pop-up, select the option Set selector
-
On the edit selector pop-up, provide the appropriate selector and click on Update.
Disable an artifact in a section
-
Log in to KOS Studio, and from My Images, click on Open Image Manager (in the upper right corner of the screen)
-
From the list of images, select the image you want to update and click on Settings
for that image(on right hand side for image row) -
Select the Configure tab from the top menu on the image configuration window.
-
From the Image Configuration window that opens, select Sections.
-
On Section screen, select the artifact in a section to disable. Click on the more
and select Disable Consider Following :-
Disabling an artifact in a section is not available for a locked image.
-
Enable an artifact in a section
-
Log in to KOS Studio, and from My Images, click on Open Image Manager (in the upper right corner of the screen)
-
From the list of images, select the image you want to update and click on Settings
for that image(on right hand side for image row) -
Select the Configure tab from the top menu on the image configuration window.
-
From the Image Configuration window that opens, select Sections.
-
On Section screen, select the disabled artifact in a section to enable. Click on the more
and select Enable Consider Following :-
Enabling an artifact in a section is not available for a locked image.
-
Delete an artifact in a section
-
Log in to KOS Studio, and from My Images, click on Open Image Manager (in the upper right corner of the screen)
-
From the list of images, select the image you want to update and click on Settings
for that image(on right hand side for image row) -
Select the Configure tab from the top menu on the image configuration window.
-
From the Image Configuration window that opens, select Sections.
-
On Section screen, select the artifact in a section to delete Click on the more
and select Delete.
Consider Following :-
Deleting an artifact in a section is not available for a locked image.
-
For a child image, deleting an artifact in a section is not available for inherited artifacts.
-
On this page
Java Development
Seamlessly transition from Legacy+ systems to Freestyle microdosing and advanced distributed dispense systems.
UI Development
Using KOS SDKs, integrating Consumer and Non-consumer facing UIs becomes seamless, giving you less hassle and more time to create.
Video Library
Meet some of our development team, as they lead you through the tools, features, and tips and tricks of various KOS tools.
Resources
Familiarize yourself with KOS terminology, our reference materials, and explore additional resources that complement your KOS journey.
Copyright © 2024 TCCC. All rights reserved.