Documentation
Local Artifact
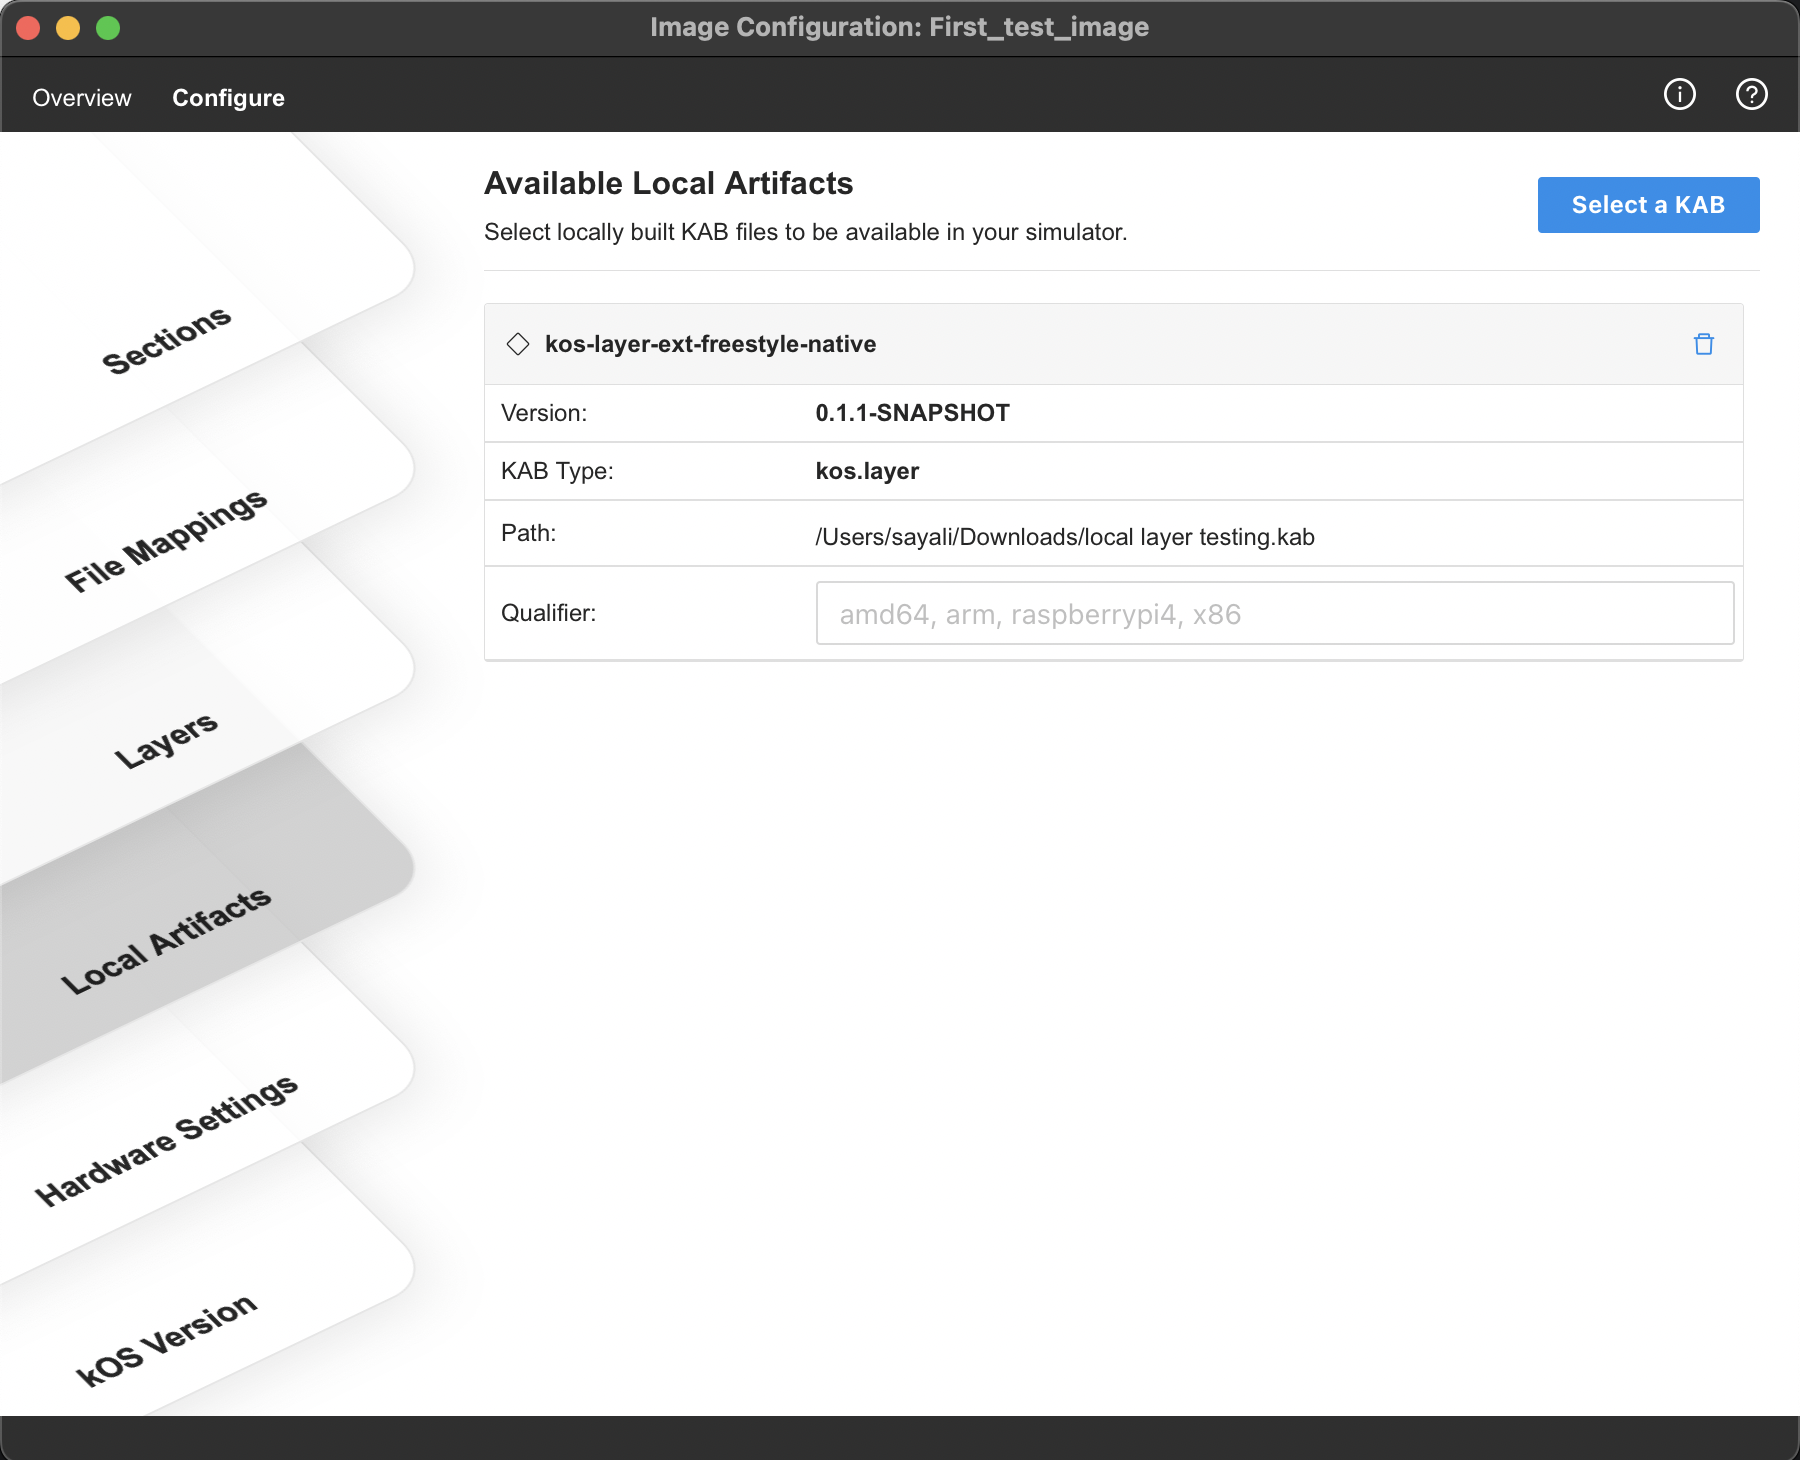
The local Artifact tab in the image configuration window lets users select a locally available KAB for use in the image. There could be several reasons a user would want to use this; maybe my organization is still working on publishing the artifacts , or the user wants to test out the changes they have made work as intended.
Figure 1. Configure local artifacts
Access and view local artifacts for an image
-
Log in to KOS Studio, and from My Images, click on Open Image Manager (in the upper right corner of the screen)
-
From the list of images, select the image you want to update and click on Settings
 for that image(on right hand side for image row)
 -
Select the Configure tab from the top menu on the image configuration window.
-
From the Image Configuration window that opens, select Local Artifacts. Here, you can view all locally available KAB files associated with your image.
Select a local artifact
-
Log in to KOS Studio, and from My Images, click on Open Image Manager (in the upper right corner of the screen)
-
From the list of images, select the image you want to update and click on Settings
for that image(on right hand side for image row) -
Select the Configure tab from the top menu on the image configuration window.
-
From the Image Configuration window that opens, select Local Artifacts. Here, you can view all locally available KAB files associated with your image.
-
Click on the Select a KAB button from the top right. This will open a file browser model to select a local KAB file to be added to the image.
-
Browse and select the KAB file from your PC’s file system and click on the Select button to add the KAB file as a local artifact. Once the KAB file is selected, the system will show the selected file, version, KAB type, and path for a given file on the available local artifacts screen. Consider following :
-
Selecting a local artifact is disabled for a locked image.
-
For a child image, inherited local artifacts are indicated via inherited label

-
Selected layer local artifact is available via Layers to be added to an image.
-
Selected non layer local artifact is available via Sections to be added to an image.
-
Delete a local artifact
-
Log in to KOS Studio, and from My Images, click on Open Image Manager (in the upper right corner of the screen)
-
From the list of images, select the image you want to update and click on Settings
for that image(on right hand side for image row) -
Select the configure tab from the top menu on the image configuration window.
-
From the Image Configuration window that opens, select Local Artifacts. Here, you can view all locally available KAB files associated with your image.
-
Select the local artifact you wish to delete and click on the delete icon
 displayed in the right corner of the image name header.
Consider following :
displayed in the right corner of the image name header.
Consider following :-
Deleting a local artifact is disabled for a locked image.
-
On this page
Java Development
Seamlessly transition from Legacy+ systems to Freestyle microdosing and advanced distributed dispense systems.
UI Development
Using KOS SDKs, integrating Consumer and Non-consumer facing UIs becomes seamless, giving you less hassle and more time to create.
Video Library
Meet some of our development team, as they lead you through the tools, features, and tips and tricks of various KOS tools.
Resources
Familiarize yourself with KOS terminology, our reference materials, and explore additional resources that complement your KOS journey.
Copyright © 2024 TCCC. All rights reserved.