Documentation
Manage Users
In KOS Studio, you manage users via User Management.
To log in and access KOS Studio, the user must have KOS Studio installed, and they must be invited to an organization and assigned to at least one active project within that organization.
|
Managing Users is only available to KOS studio admin users. |
Access user management
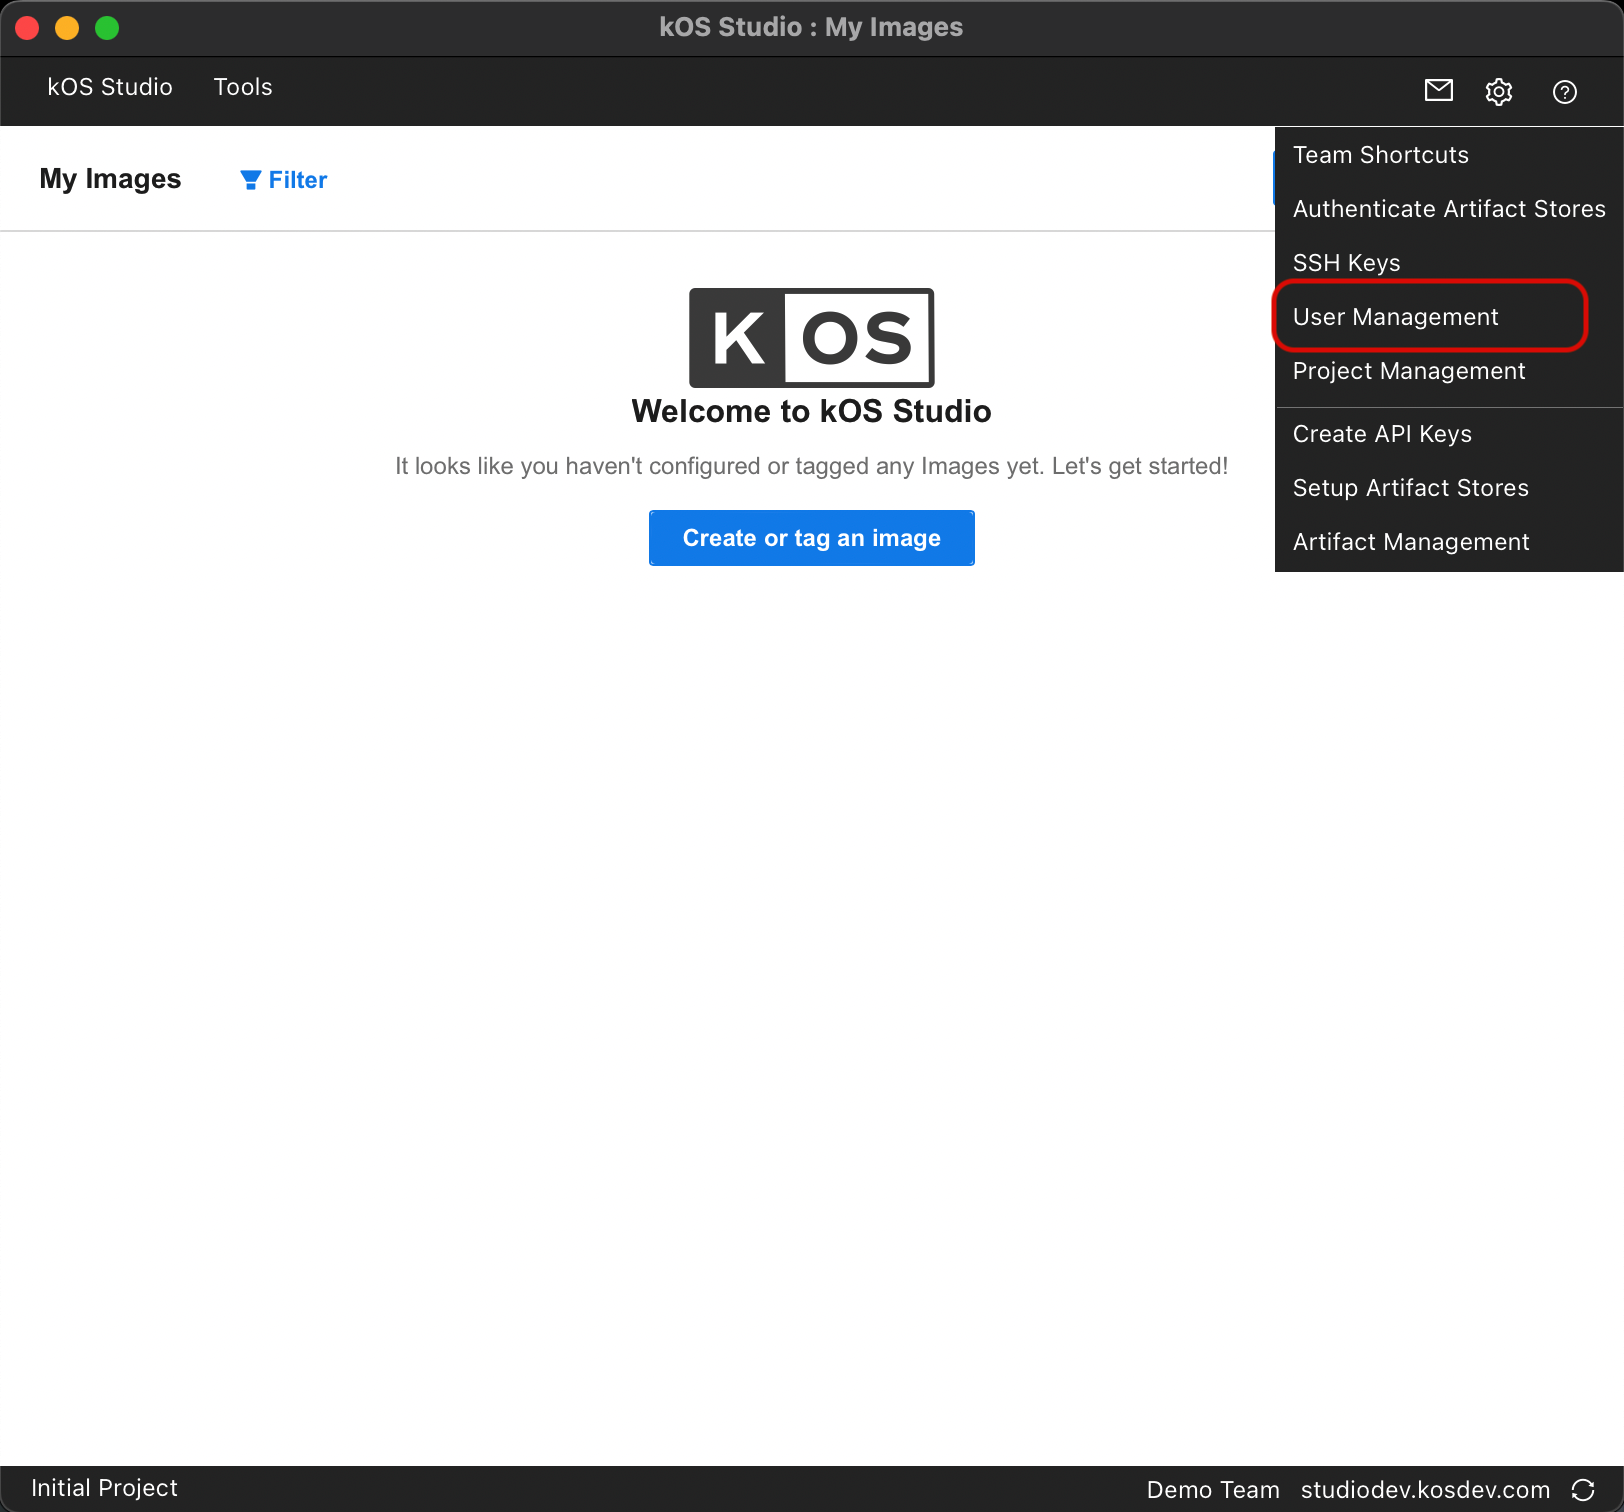
To access user management settings in KOS Studio, select Settings (in the upper right corner of the screen) > User management
Figure 1. Navigating to User Management Settings
Create new users
Invite user
You can invite users to your organization through email. When they accept the invitation, they will be given access to the organization for a public project.
To Invite a User:
-
In the upper right corner of the screen, select Settings
 > User management
 -
In the User Management window that opens, select Invite User (in the upper-right corner of the screen)
-
On the pop-up that opens provide the email address for the user.
-
Optionally you can add notes, and grant admin rights to the user.
-
Notes are only visible to other administrators and can be 256 characters max.
-
-
Select the Invite button to send the invitations. Consider following:
-
Each invitation can only be used to create a user under the email address it was sent to, and can only be used once.
-
Each invitation will expire five days after the day it was sent.
-
View pending invitation
To view a pending invitation
-
In the upper right corner of the screen, select Settings
> User management -
On the User Management window that opens, select the Invitees tab ( in the upper left section of the screen)
-
Here you can see the email list of all invited users who are yet to accept the invitation. Consider following :
-
Each invitation will expire five days after the day it was sent and will be removed from this screen.
-
Resend invitation
To resend an invitation:
-
In the upper right corner of the screen, select Settings
> User management -
On the User Management window that opens, select the Invitees tab ( in the upper left section of the screen)
-
From the email list of invitees, select the email invitation to resend.
-
In the invitation details section select Reinvite
 (in the upper right corner in invitation details section)
 -
Selecting reinvite will resend an email.
Delete invitation
To delete an invitation:
-
In the upper right corner of the screen, select Settings
> User management -
On the User Management window that opens, select the Invitees tab ( in the upper left section of the screen)
-
From the email list of invitees, select the email invitation to delete.
-
In the invitation details section select Delete
 (in the upper right corner in invitation details section)
 -
Selecting delete will delete an invitation.
When you delete a user invitation
-
Previously sent invitation token is revoked - and will appear to the user to be an invalid token
-
The invitation will be removed from the invitee’s tab on User Management.
Manage existing users
View user
To View Users within your organization:
-
In the upper right corner of the screen, select Settings
> User management -
In the User Management window that opens, select User (in the upper-left corner of the screen)
-
All users within your organization are displayed here.
Edit user
To edit a user information:
-
In the upper right corner of the screen, select Settings
> User management -
In the User Management window that opens, select User (in the upper-left corner of the screen)
-
Select the user you want to edit from the list of users.
-
User details will be displayed
-
Click on the Edit icon to edit user information. Consider following :
-
The user owns KOS User accounts, and an organization administrator cannot edit the email address, and their username. You can edit their settings to your organization
-
An Administrator right can be granted or removed for a user
-
Grant admin permission
To make a user an administrator:
-
In the upper right corner of the screen, select Settings
> User management -
In the User Management window that opens, select User (in the upper-left corner of the screen)
-
Select the user you want to edit from the list of users.
-
User details will be displayed. Click on the Edit icon > Click on Admin toggle to On
Revoke administrator permission
To revoke administrator permissions:
-
In the upper right corner of the screen, select Settings
> User management -
In the User Management window that opens, select User (in the upper-left corner of the screen)
-
Select the user you want to edit from the list of users.
-
User details will be displayed. Click on the Edit icon > Click on Admin toggle to Off.
Suspend user
To temporarily block a user from accessing your organization’s data you may suspend them. This is a good option when the user may rejoin the organization in future
To suspend a user :
-
In the upper right corner of the screen, select Settings
> User management -
In the User Management window that opens, select User (in the upper-left corner of the screen)
-
Select the user you want to edit from the list of users.
-
User details will be displayed
-
Click on Active toggle to Off. Consider following:
-
you can not suspend yourself.
-
Suspended user can not log in to your organization until user access is restored
-
Remember that suspending is a temporary blocking access, once you restore the user, the user will have access to all the data and retain all the previous access within KOS Studio.
-
Restore user
To restore a previously suspended user :
-
In the upper right corner of the screen, select Settings
> User management -
In the User Management window that opens, select User (in the upper-left corner of the screen)
-
Select the user you want to edit from the list of users.
-
User details will be displayed
-
Click on the Active toggle to On. Consider following :
-
Suspended user can not log in to your organization until user access is restored
-
After restoring the user, the user has access to all the data and retains all the previous access within KOS Studio.
-
Remove user
To permanently remove a user :
-
In the upper right corner of the screen, select Settings
> User management -
In the User Management window that opens, select User (in the upper-left corner of the screen)
-
Select the user you want to edit from the list of users.
-
User details will be displayed
-
Click Delete. Type in the username for the user you want to delete and click Remove. Consider the following :
-
You can not remove yourself from an organization. If needed you can follow: Remove from org [Hyperlink to that article]
-
Once the user is deleted all permissions associated with that user are deleted and can not be recovered.
-
On this page
Java Development
Seamlessly transition from Legacy+ systems to Freestyle microdosing and advanced distributed dispense systems.
UI Development
Using KOS SDKs, integrating Consumer and Non-consumer facing UIs becomes seamless, giving you less hassle and more time to create.
Video Library
Meet some of our development team, as they lead you through the tools, features, and tips and tricks of various KOS tools.
Resources
Familiarize yourself with KOS terminology, our reference materials, and explore additional resources that complement your KOS journey.
Copyright © 2024 TCCC. All rights reserved.