
Install kOS Bootloader
Tool - RPi Imager
Prerequisite
-
Download the bootloader image file for your board from kOS Developer’s Portal
-
In Mac OS, the file is automatically unarchived, and the kos-installer.img file will be present in the download location.
-
In Windows, the user must unarchive the downloaded file and use kos-installer. img for flashing.
-
-
Download and Install Raspberry Pi Imager from here
-
Access to USB thumb drive or SD card or Raspberry Pi board you are flashing should be in USB boot mode.
Using Raspberry Pi Imager
-
Run the Raspberry Pi Imager program.
Figure 1. -
Click the "CHOOSE OS" button.
-
From the "Operating System" dialog, scroll to the bottom and select "Use custom".
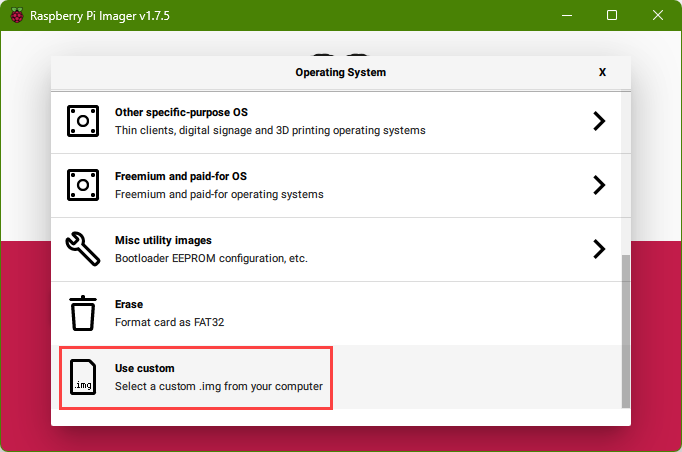 Figure 2.
 -
Navigate to and then select the disk.img.gz file previously downloaded.
-
Click the "CHOOSE STORAGE" button.
-
Select the drive that represents the Raspberry Pi device or storage device that you are using.
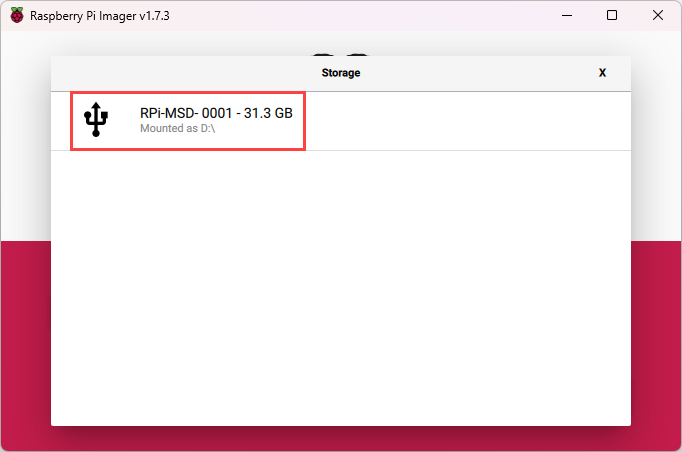 Figure 3.
 -
When ready, click the "WRITE" button.
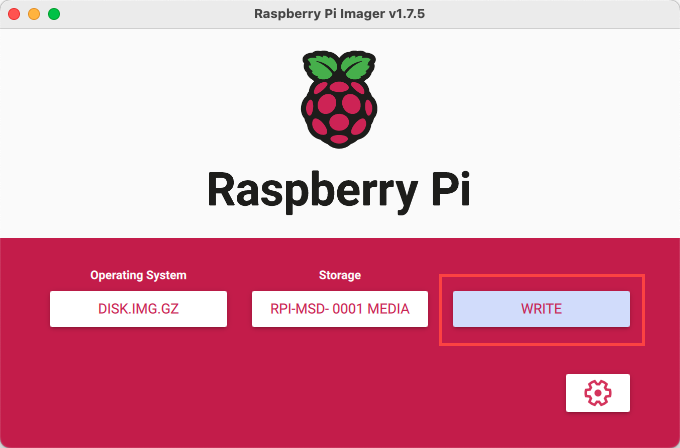 Figure 4.
 -
Click "YES" at the confirmation popup. Writing begins and progress is displayed with a status bar:
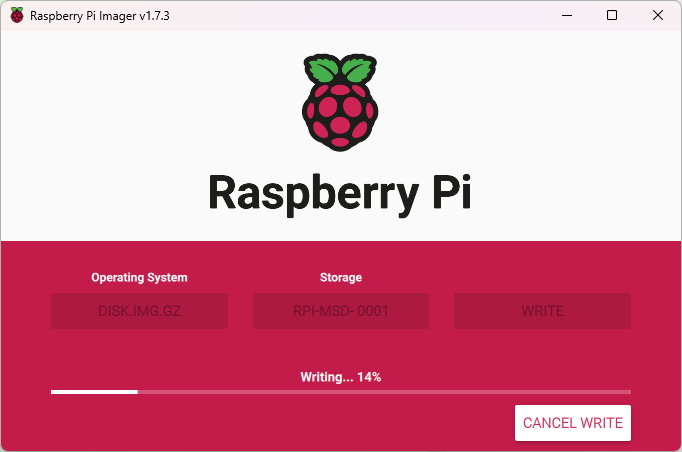 Figure 5.
 -
The disk image is written and then verified, which takes a few minutes.
 Figure 6.
On this page
Java Development
Seamlessly transition from Legacy+ systems to Freestyle microdosing and advanced distributed dispense systems.
UI Development
Using kOS SDKs, integrating Consumer and Non-consumer facing UIs becomes seamless, giving you less hassle and more time to create.
Video Library
Meet some of our development team, as they lead you through the tools, features, and tips and tricks of various kOS tools.
Resources
Familiarize yourself with kOS terminology, our reference materials, and explore additional resources that complement your kOS journey.
Copyright © 2024 TCCC. All rights reserved.