
Tutorials
Use UI KAB File
Introduction
In this tutorial, we’ll use the React user interface KAB file created previously. Our kOS application will load this UI KAB file and make it available to a local browser.
Studio
In kOS Studio, follow these steps to add our new KAB file to our application’s image.
1) Open the image configuration window for your application:
Figure 1. Open image configuration window
2) In the Local Artifacts card, add our UI KAB file we created in the previous tutorial:
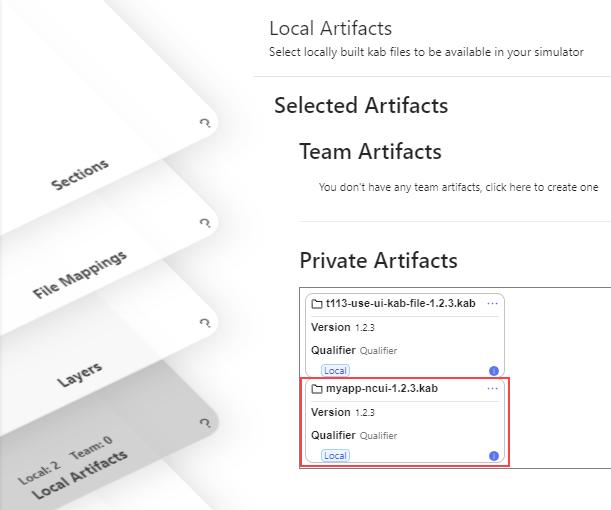
Figure 2. Adding UI KAB file to list of local artifacts
3) In the Sections card, drag and drop this KAB into the kos.system section:
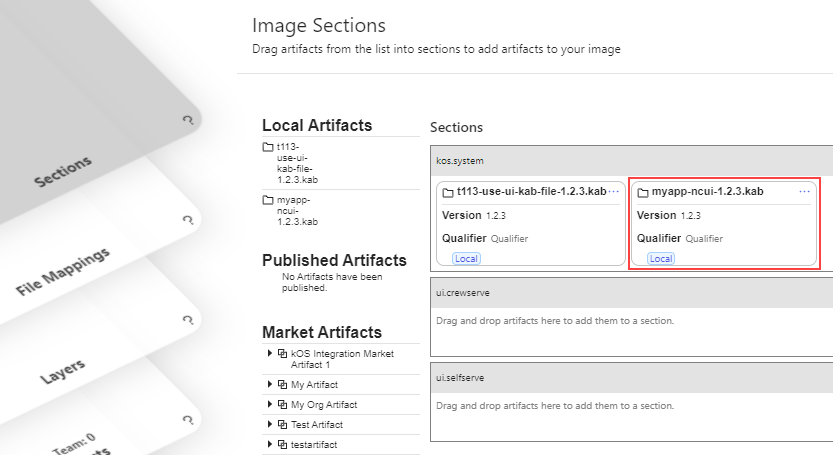
Figure 3. Adding local artifact to section
4) Ensure that in Settings > Port Mappings that the HTTP Local Override port is still set to 8081:
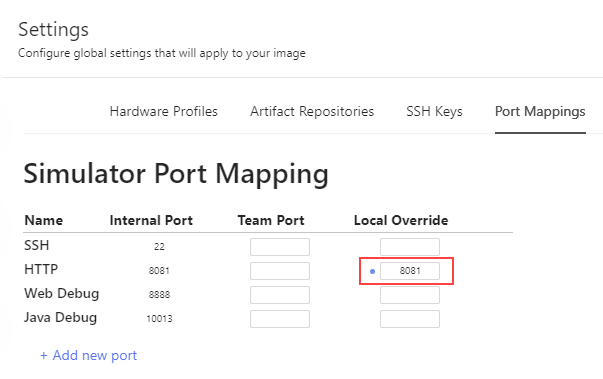
Figure 4. HTTP local override port
Java
Now that our image contains the UI KAB file, we need to load it from our Java code.
Make the following changes to the MyKosApp class:
public class MyKosApp extends SystemApplication<AppConfig> {

    @Override
    public void load() {
        log.info("MyKosApp.load()");
        // Create the controller and add it to the kOS context:
        getCtx().add(new MyController());
        // Mount user interface KAB files:
        mountUIKabs(); (1)
    }

    private void mountUIKabs() {
        KabFile ncuiKab = getSection().getKabByType("ncui"); (2)
        if (ncuiKab == null) {
            throw new RuntimeException("NCUI KAB file not found");
        }
        getVfs().mount("/ncui", new KabVFSSource(ncuiKab)); (3)
        log.info("NCUI loaded");
    }

    // . . .
}| 1 | Call to mount all UI KAB files |
| 2 | Grab our KAB file by looking up its type |
| 3 | Mount this KAB to our virtual file system at "/system/ncui" "system" is our appId (refer to descriptor.json); "ncui" passed into the mount method |
React
We need to make one small change to our React UI code. Open the apps/my-kos-app-ui/.env file and change the VITE_PORT value from 9881 to 8081.

Figure 5. Configuring UI port to match HTTP local override port
Rebuild the project by running the buildall.sh script from the project’s home directory.
See It In Action
Now that everything is in place, let’s run our application in the Studio simulator:

Figure 6. Run our application on Studio simulator
Once the application has started, open a browser window and navigate to:
http://localhost:8081/system/ncui/index.htmlSee your application appear:
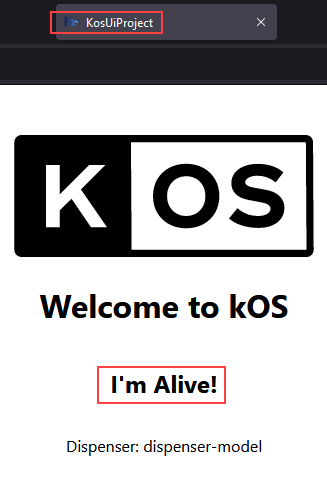
Figure 7. Output of application shown inside a local browser window
Summary
In this tutorial, we:
-
Turned our React user interface code into a KAB file
-
Modified our Java code to load that KAB UI into its virtual file system
-
Verified that our React UI ran properly by using a local browser
In the next tutorial, we figure out how to run our application in the simulator’s window instead of a local browser’s window.
From this point forward we’ll show fewer Studio screenshots, as you should know how to open Studio, edit an image’s configuration, and run an application in the simulator.
On this page
Java Development
Seamlessly transition from Legacy+ systems to Freestyle microdosing and advanced distributed dispense systems.
UI Development
Using kOS SDKs, integrating Consumer and Non-consumer facing UIs becomes seamless, giving you less hassle and more time to create.
Video Library
Meet some of our development team, as they lead you through the tools, features, and tips and tricks of various kOS tools.
Resources
Familiarize yourself with kOS terminology, our reference materials, and explore additional resources that complement your kOS journey.
Copyright © 2024 TCCC. All rights reserved.